

In today’s digital age, securing and monitoring our virtual infrastructure is more critical than ever. As a part of this ongoing journey, I recently completed a comprehensive lab setup that allowed me to delve deep into Microsoft’s Azure platform, specifically focusing on Azure Sentinel, Azure’s scalable, cloud-native, security information event management (SIEM) and security orchestration automated response (SOAR) solution.
This blog post will serve as a walk-through of this lab, providing insights on setting up Azure resources, implementing security best practices, utilizing data connectors, understanding and configuring Windows security logs and policies, crafting KQL queries, writing custom analytic rules, and mapping adversary tactics using MITRE ATT&CK. So, let’s dive right in.
- Step 1: Setting up Azure's Crucial Components
- Step 2: Building a Robust Security Framework
- Step 3: Harnessing Sentinel's Data Connectors
- Step 4: Decoding Windows Security Logs
- Step 5: Creating Custom Analytic Rules and Scheduling Tasks
- Step 6: Mastering Kusto Query Language
- Step 7: Mapping Threats with MITRE ATT&CK Framework
Step 1: Setting up Azure’s Crucial Components
For the foundation of our security infrastructure, I started with the configuration and deployment of essential Azure resources. This phase involved setting up Log Analytics Workspace, creating Virtual Machines, and deploying Azure Sentinel. These tools together formed the fundamental environment for our security management.
– Create Azure Resource group.

– Create azure VM and deploy

Step 2: Building a Robust Security Framework
Following the setup, I proceeded to incorporate security best practices into the network and virtual machines. My main objective was to ensure that our environment was secure and well-prepared to defend against potential threats.
When deploying the VM, I made sure to place the virtual machine within a vnet (Virtual Network) and NSG (Network Security Group) with default configurations. These resources can be found in the resource group named ‘cloudlab’.
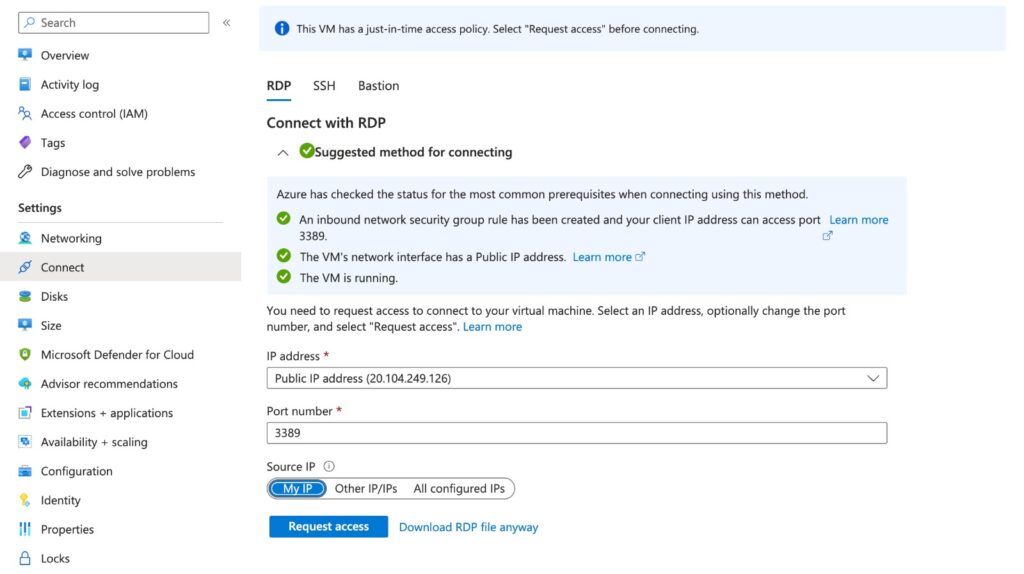
Initially, the VM had RDP access enabled from any IP address, which posed a significant security risk. To address this vulnerability, I decided to implement Just-in-Time (JIT) access for the VM. JIT access is a feature provided by Azure that allows temporary and controlled access to VMs for specific administrative tasks. Its primary purpose is to enhance security by reducing the exposure of VMs to potential attacks and limiting access to only when necessary.
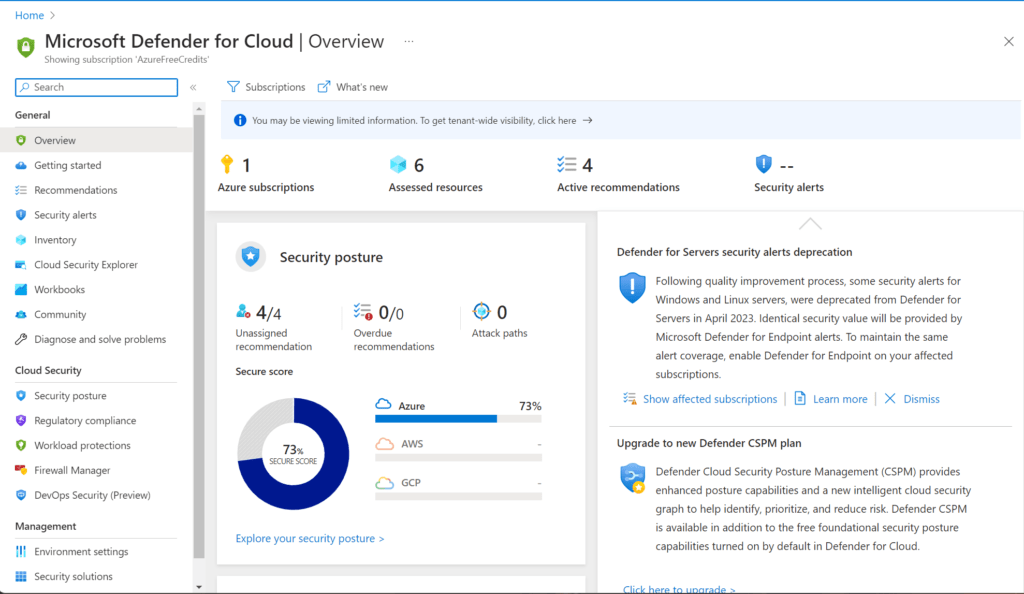
– Setting up Microsoft Defender for Cloud
Enabling defender plans from Environment Settings
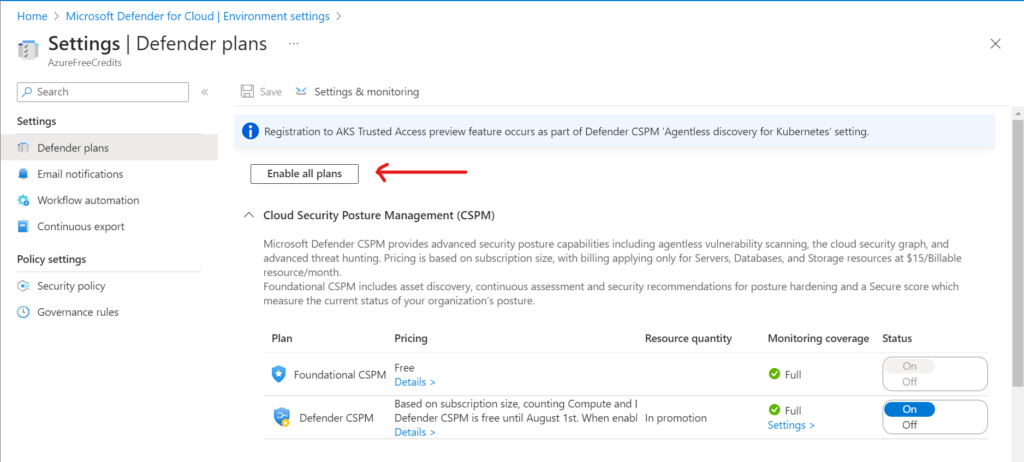
To enable JITM, I navigated to the VM’s configuration tab or Microsoft Defender’s Workload Protection tab. From there, I activated JITM with the default settings. This feature provides temporary, controlled access to the VMs for specific administrative tasks, significantly reducing the exposure of the environment to potential attacks.

– We are then required to ask for access from VM’s connect tab.
for verification Correct configuration can be viewed in NGS group
Step 3: Harnessing Sentinel’s Data Connectors
Next, it was time to bring in data for Sentinel to analyze. I utilized data connectors in Azure Sentinel to achieve this, demonstrating the power of centralized monitoring and analysis in a digital infrastructure.
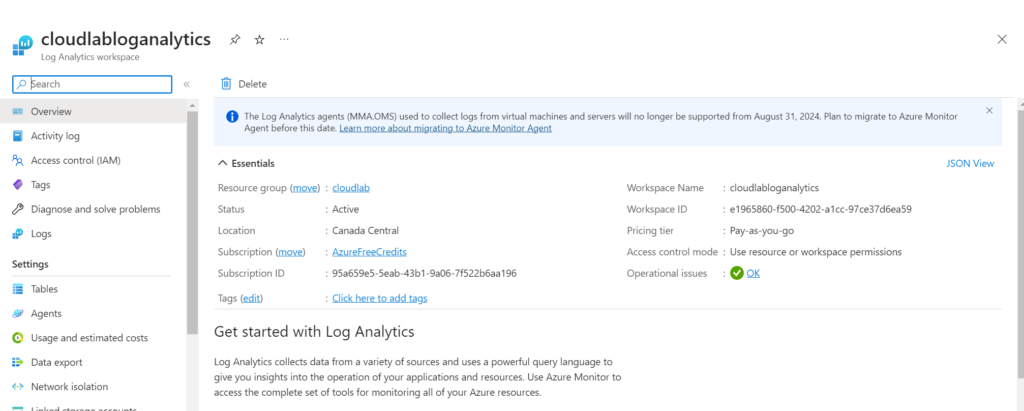
– Create Log Analytics Workspace
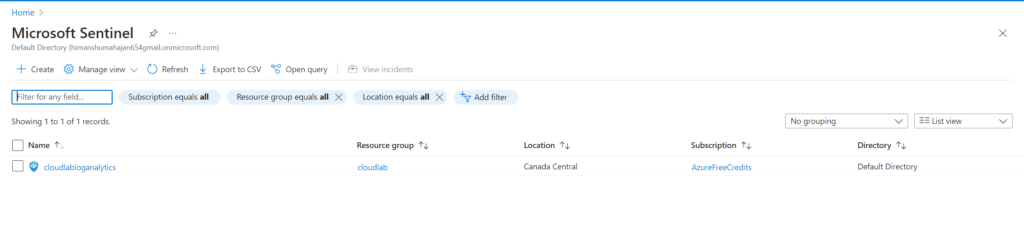
– Go to Microsoft Sentinel and add analytics workspace to sentinel
– Go to Microsoft Defender’s Data Connector tab and search Windows Security Events via AMA
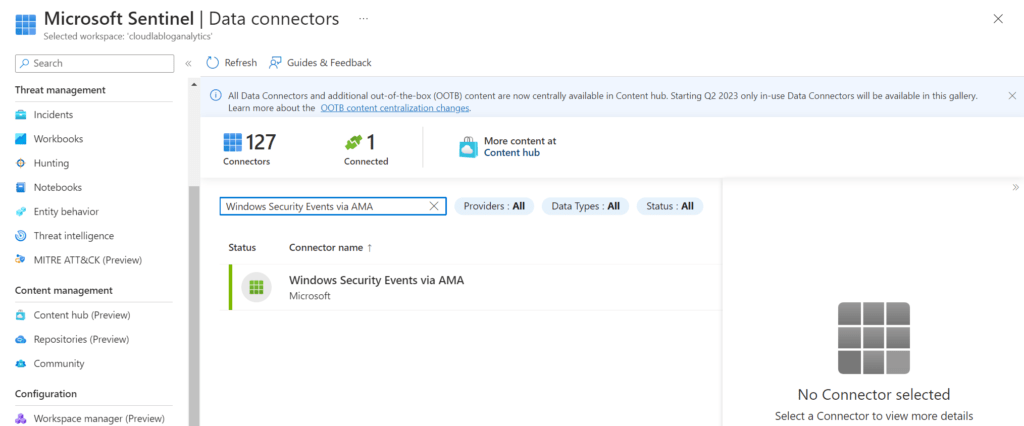
– Create collection rule under Windows Security Events Via AMA

Step 4: Decoding Windows Security Logs
To understand the heartbeat of our system, I took a deep dive into Windows Security Event logs. Recognizing what different event IDs represent and how they can be used to detect possible security incidents proved incredibly informative.
Note: Please request access via the connect tab in the VM before connecting to it via RDP due to the JITM setup.
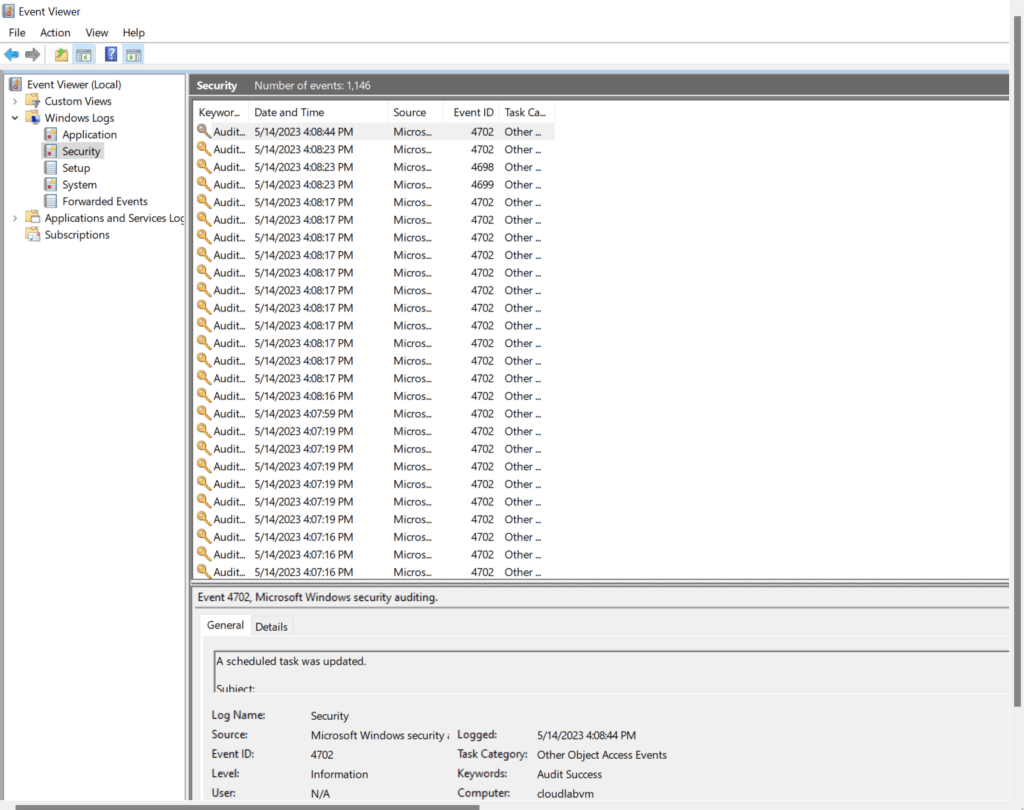
– Connect to Windows 10 VM that we created using RDP

– Open Event Viewer and go to Security logs
Here, I was able to see logs of security events
Step 5: Creating Custom Analytic Rules and Scheduling Tasks
Building upon the knowledge gathered from KQL queries, I devised custom analytic rules to automatically detect specific Microsoft Security Events. The power of automation in threat detection was clearly highlighted in this step.
– Configure Audit Other Object Access Events from Local Security Policy Editor

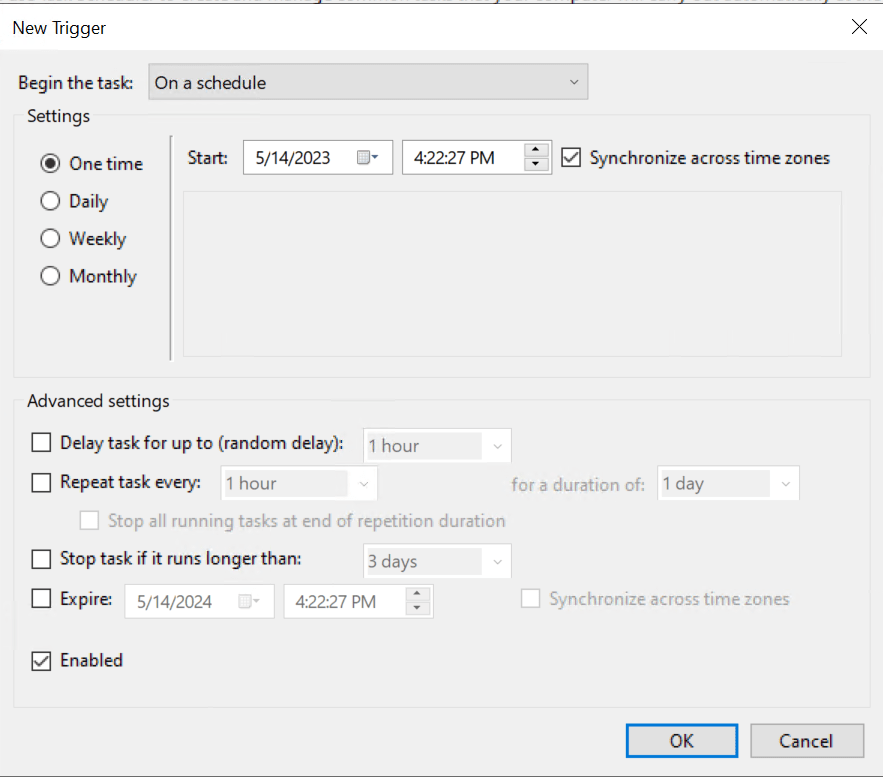
– Creating Tasks for getting logs

Scheduling for the time I wanted execution to be done
Trigger Action for Task Schedular (I have used Internet Explorer)

Step 6: Mastering Kusto Query Language
One of the most powerful tools at our disposal in Azure is Kusto Query Language (KQL). I used KQL to query logs, extract crucial information, and detect any anomalies or potential threats in our system.
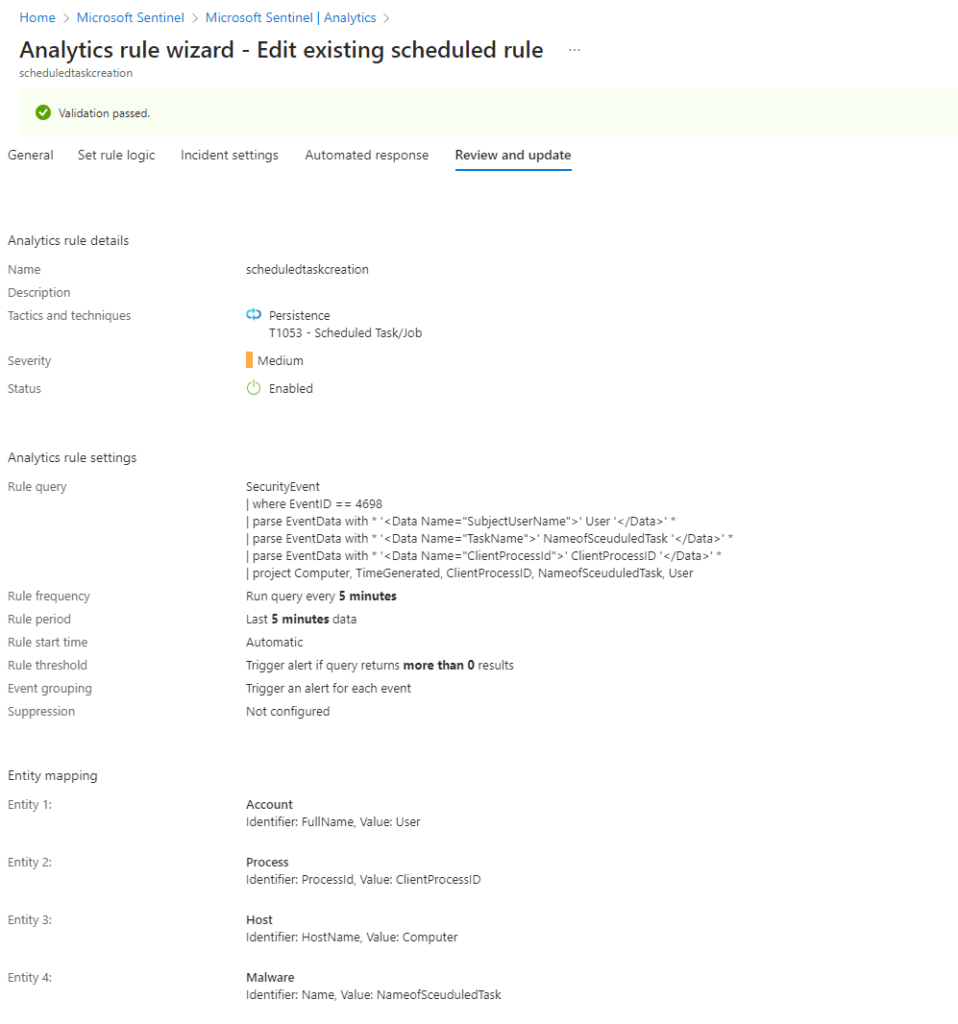
– Create Analytics Rule in Microsoft Sentinel
I opened the Analytics Rule wizard and proceeded to use the following rule logic. Firstly, I selected Event ID 4698, which is commonly associated with Task Scheduler. I then specified the Tactics/Techniques as persistence (T1053 – Schedular Task/Job).
To narrow down the data and obtain only the information required, I utilized entity mapping. This allowed me to refine the data according to specific parameters, making the analysis more focused and effective. By utilizing the Analytics Rule wizard in this way, I was able to improve our ability to detect and respond to potential threats in a timely and effective manner.
SecurityEvent
 | where EventID == 4698
 | parse EventData with * '<Data Name="SubjectUserName">' User '</Data>' *
 | parse EventData with * '<Data Name="TaskName">' NameofSceuduledTask '</Data>' *
 | parse EventData with * '<Data Name="ClientProcessId">' ClientProcessID '</Data>' *
 | project Computer, TimeGenerated, ClientProcessID, NameofSceuduledTask, User
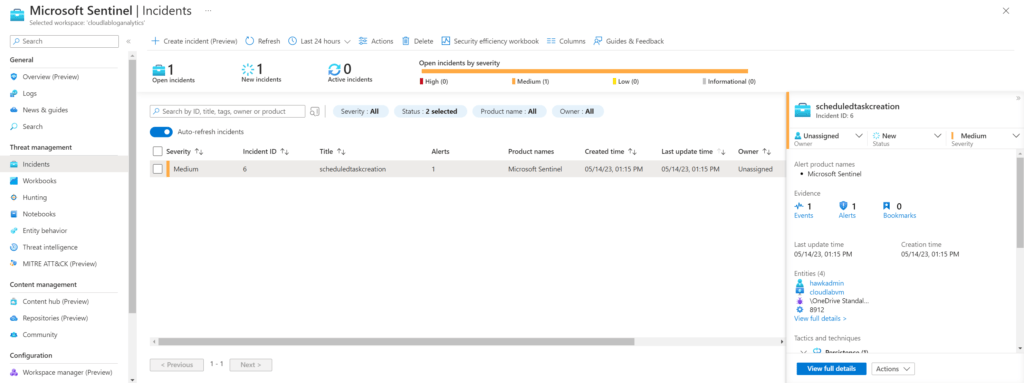
Here, I was able to get log of task scheduled in sentinel Incidents Tab
Step 7: Mapping Threats with MITRE ATT&CK Framework
Finally, I used the MITRE ATT&CK framework to understand and map potential adversary tactics and techniques. This part of the lab was particularly interesting as it provided a structured approach to understanding the landscape of cyber threats and devising effective countermeasures.
The MITRE ATT&CK tactic observed in this lab is referred to as TA0003 Persistence. This tactic is used by malicious actors to establish a foothold within a targeted environment, allowing them to maintain access and control over a prolonged period.

To establish persistence in this instance, the sub-technique of employing a scheduled Task/Job was used. Attackers frequently employ this method, which poses a serious risk to the environment’s security in an organisation.
We used monitoring and logging particular Windows event IDs to find such attacks. However, MITRE offers more guidance for identifying persistence-based assaults.
MITRE advises establishing user account management policies that restrict the privileges of users who are authorized to set scheduled tasks on distant systems in order to lessen the risk posed by this kind of threat. Organizations can dramatically lessen their exposure to persistence-based attacks by limiting these privileges to just authorized admins.
Conclusion:
Lastly, I would like to express my gratitude to Cyberwox academy for providing the project idea and inspiration for this walkthrough. It was a valuable experience to work through the Azure Sentinel lab, gaining practical exposure to essential cybersecurity tools and practices.
I sincerely hope that this guide has been helpful to those seeking to learn more about Azure Sentinel and its capabilities. Stay tuned for more in-depth explorations into the ever-evolving world of cybersecurity!
Don’t hesitate to leave a comment on this post if you have any questions or concerns about implementing Azure Sentinel in your environment. Let’s work together to create a more secure digital world.
Latest Posts:
- Unifi Dream Router: Unleashing Its Power Across Homes, Businesses, and Beyond
- Part 6: Maintaining and Troubleshooting Your Home Server
- Part 5: Setting Up and Managing Server Applications
- Part 4: Networking and Security for Home Servers
- Part 3: Selecting Your Home Server Operating System
- Part 2: Choosing the Right Hardware for Your Home Server